In today’s post, I’m going to discuss the steps I take to paint a mallard drake’s head in a waterfowl painting. The feathers of a mallard duck drake are an irridescent green color with hints of blue mixed in.
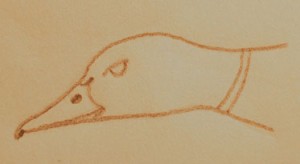
I start out with any duck by creating a detailed drawing of the bird on paper using several reference sources. I then transfer this sketch to the canvas in preparation for the application of the paints. When the sketch is in place on the canvas, I start out with the head of the duck.
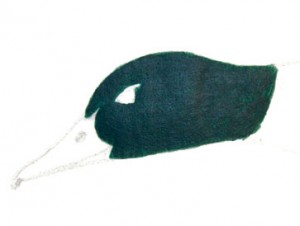
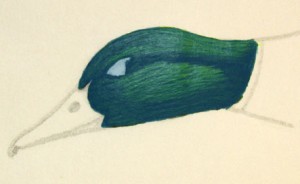
I start out with hunter green and add enough ultramarine blue to make a dark blue-green color. I apply this color mix to the entire head of the drake. I usually apply three coats of the color to make sure I get good coverage.
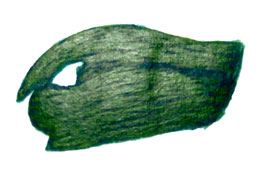
For my midtone value, I mix cadmium yellow medium and a little titanium white, which gives me a lemon yellow. I add a small amount of this yellow mixture to the dark blue-green mix. I want this midtone value to be about three shades lighter than the dark blue-green value. This mix will contain a little more water to make it slightly thinner than the dark value. Using a small flat brush, I begin painting the feathers of the head. With this color, I’m actually laying in the feather groups on the head from the bottom to the top.
My highlight value consists of the midtone value with more of the lemon-yellow value added to bring up the color three shades lighter than the midtone value. With this color, I start where the brightest light is hitting the feathers, and start highlighting the top half of each feather in the group all the way to the top of the head. There are a lot of brush strokes in this step and I have to be careful not to completely cover the midtone feather groups with this highlighted color.
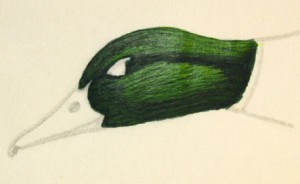
When this layer is dry, I mix ultramarine blue with enough water to make a thin glaze. After I dip the brush in the glaze, I remove most of the paint from the brush and just lightly glaze over the entire head of the drake. This layer should not be too evident. All I want here is just a hint of blue over the greens that I’ve painted. In this photograph, I intentionally glazed over the eye so you could see the blue tint of the glaze.
The last step is to paint in the eye which I’ll talk about later in another post. Until then, keep your brushes clean, your colors pure, and as always, thanks for stopping by the North Forty.
Regards,

Thank you.



Pingback: Womens Rubber Rain Boots - What the Chic – Women’s Boots
Amazing article, I’m a massive believer in commenting on blogs and forums to assist the web page creators know that they have created something of worth to the cyberspace!
Very Interesting information thank you for your time and effort sharing very interesting topic will bookmark this Painting
This really helped me a lot! I am doing the Jr. Duck Stamp Program, and needed some background on the coloring. I know what the duck looks like from previous hunting experiences, but I needed to learn how to put it on paper. Thanks for this great help! I really appreciate it!
I was wondering what kind of paint you would use to do this on wood?
Unless you intend to prime the wood, acrylic artist paint is best suited for painting on wood since the oil in oil paint would be absorbed into the unprimed wood surface and leave the paint pigment with no binder.